As a result of the updates happening with Apple iOS 14 and Facebook in early 2021, it is required to verify your website domain with Facebook and configure your Conversions Events
You can read more about these update here and here.
IMPORTANT: The steps below must be completed by the owner of the Business Manager account. However, the whole process should only take you around 10 minutes to complete.
How To Verify Your Domain On Facebook
Follow these steps to Verify your domain. You can find additional simple instruction from Facebook here (including a short walkthrough video).
1) Go to your Business Manager settings here: https://business.facebook.com/settings/
2) In the left column, go to Brand Safety and then to Domains
3) Click the “Add” button and then enter your domain name.
4) Follow the instructions to verify the domain.
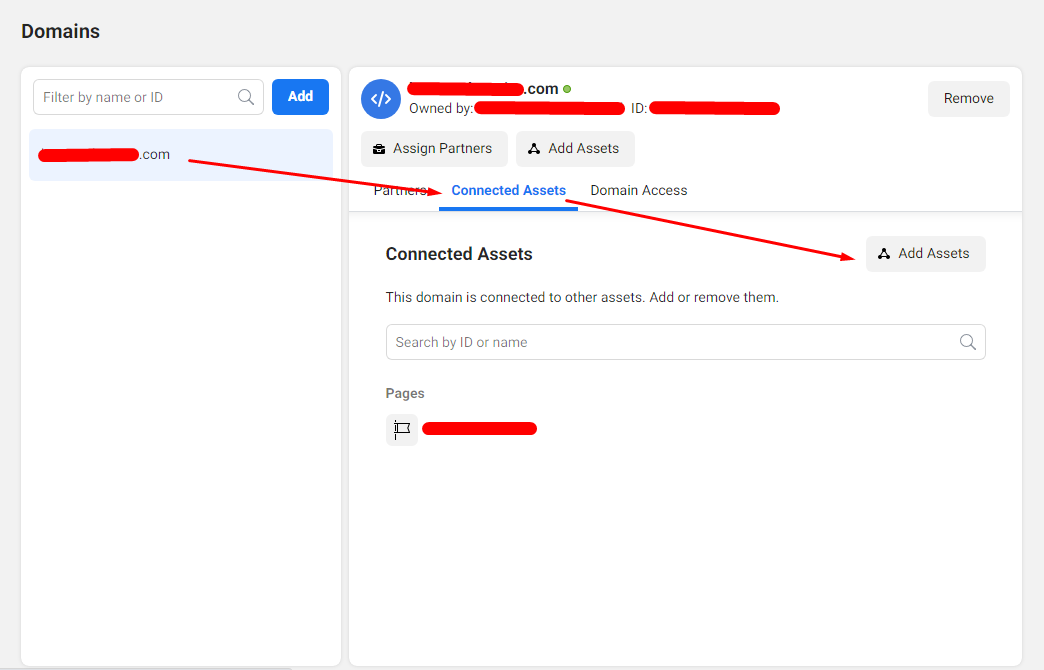
Assign the Domain to a Facebook Page (Add Assets)
5) After verifying the domain, Click “Add Assets” button and assign the domain to a Facebook page that you own.
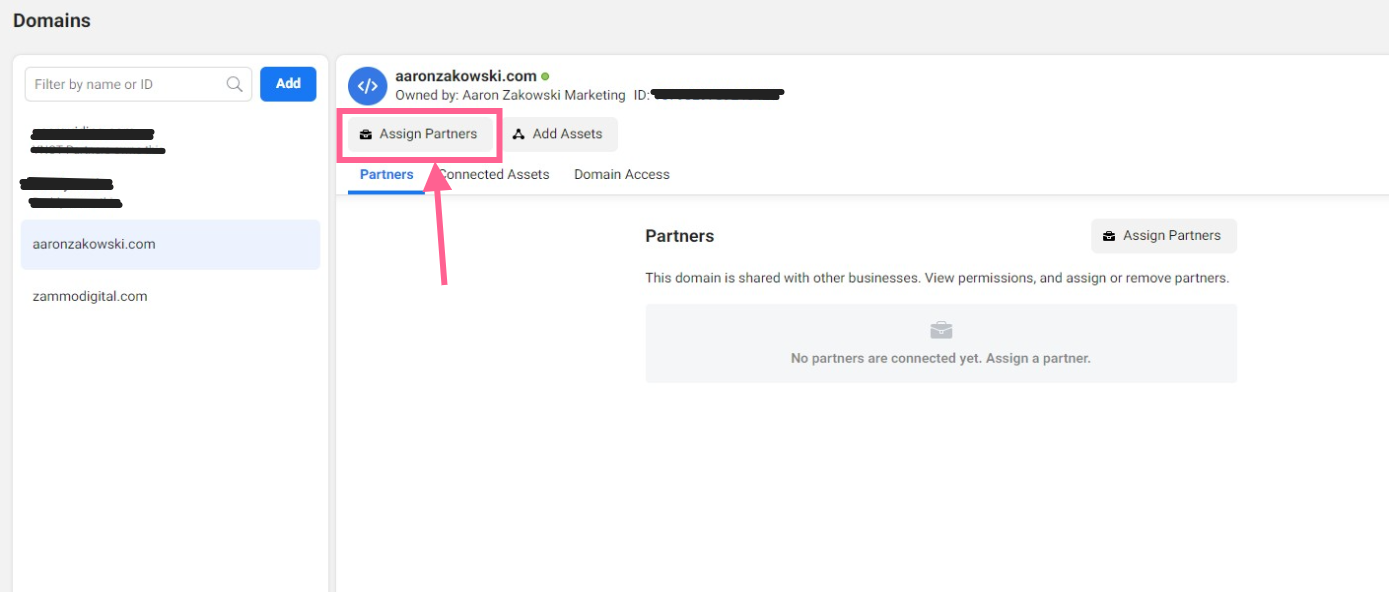
6) (Optional) If you are working with an agency like Zammo Digital, then click the “Assign Partners” button and enter our Agency ID
How To Configure Facebook Events
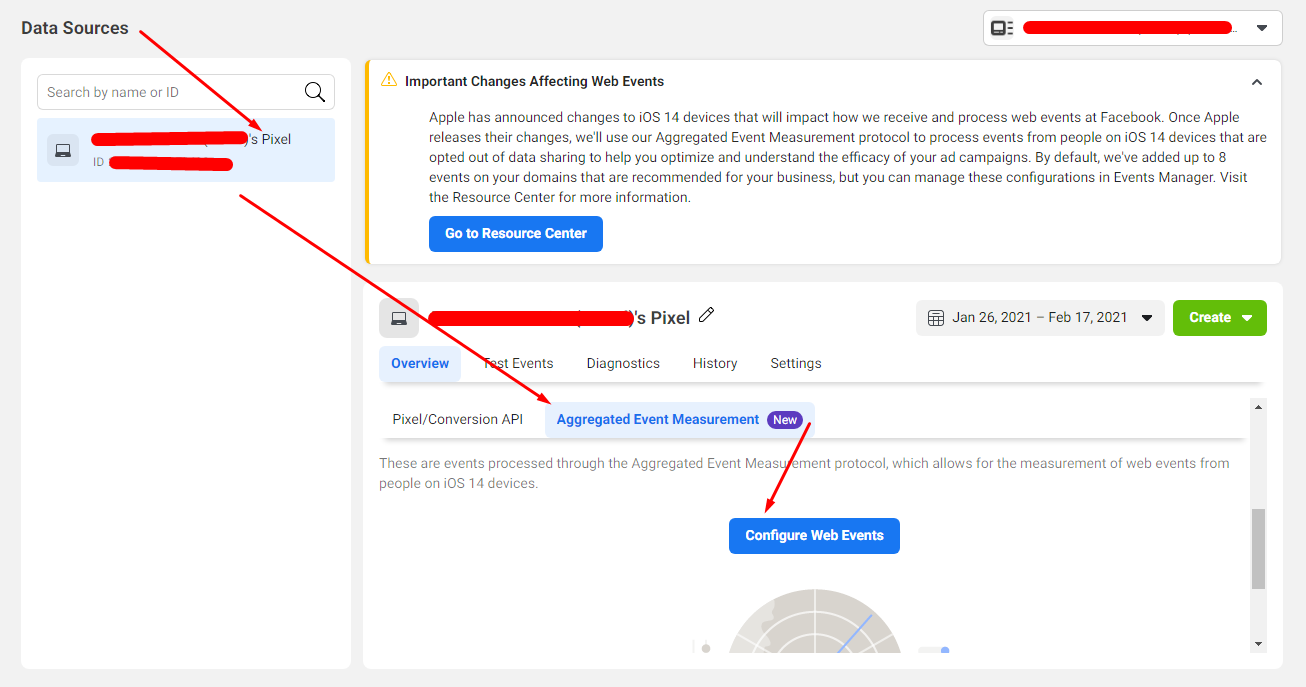
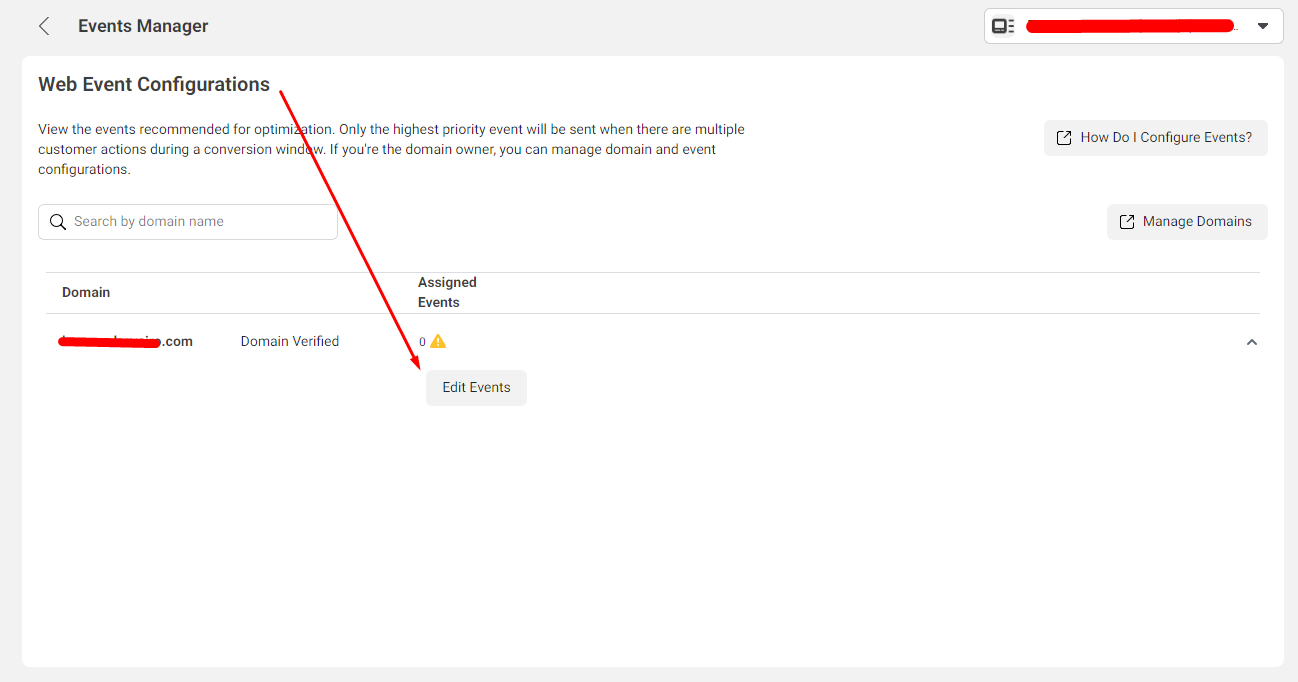
7) Go to your ad account, click Business Tools, select Events Manager

8) Click “Aggregated Event Measurement”, then click “Configure Web Events”
9) Select your verified Domain from the list and click “Edit Events” button
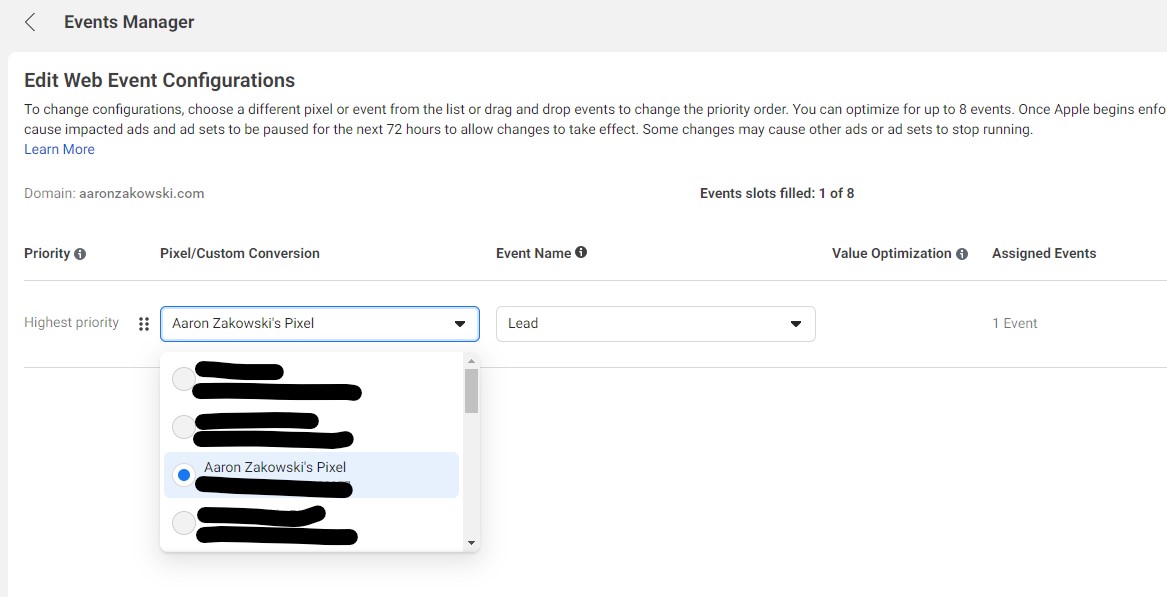
10) Click the “Add Event” button

11) Select your “Pixel/Custom Conversion” from the dropdown list
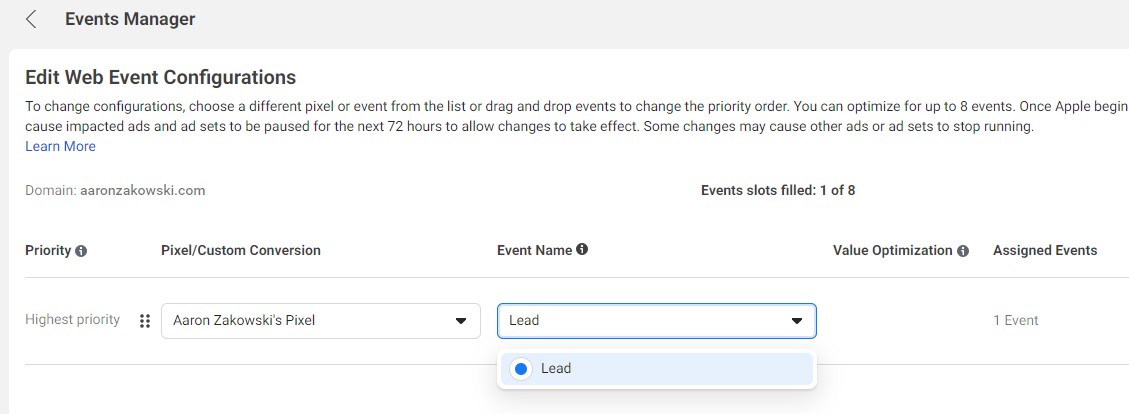
12) Select a Conversion Event from the “Event Name” dropdown list
13) Repeat the “Add Event” process (starting at step 10 above) as many times as necessary. However, remember that Facebook only allows your to configure up to 8 conversion events. So be sure to pick your most important actions that you want to track.
Beginning soon, Facebook will stop tracking and optimizing for events that aren’t configured here.
14) Drag and drop your events to set their order of priority.
15) Click Submit (lower right corner)
That’s all!
Now you should be compliant with Facebook’s new rules for domain verification and event configuration.
Hope this helps.
Hi Aaron, THanks for a very clear article. So am I right that you’re saying that a full admin with full access still can’t do the domain verificasiton for a client account?
It’s been driving me nuts going around in circles trying to work this out.
I have full ad and business manager (& page admin obviously) access but when I try to verify the domain it wants to put it under my own business. I have my domain verified so I’m guessing I need to provide your awesome article for them to walk through it.
Once they send me the verification meta tag, am I able to add the events for them? Or can only the owner set up events as well?
After searcing far and wide, your article was theonly one that made any sense on this subject. I’ll be sharing it far and wide.
Awesome stuff!
Cheers!
Can I use the SAME verified domain for different clients / ad accounts? (to run lead conversion ads for different folks)